
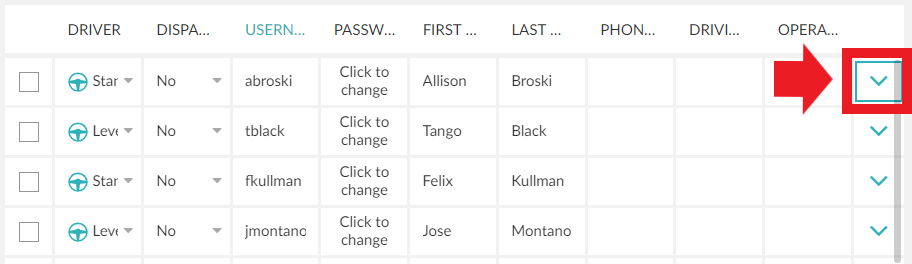
To access to the advanced options for users click on the arrow to display de menu.
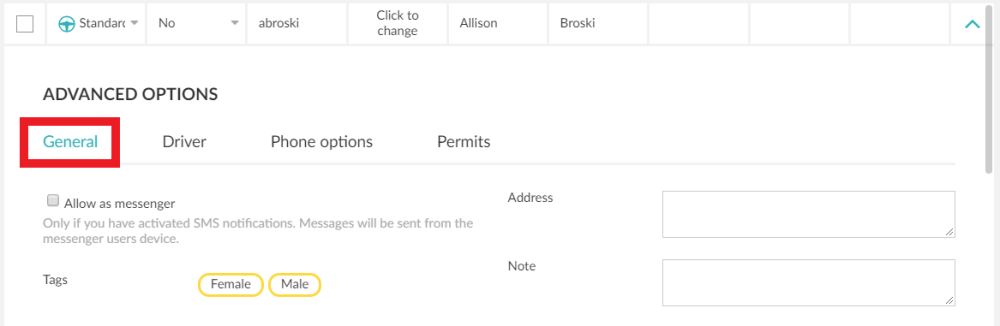
General
In this section, you can specify if your user is going to be a messenger. You can also add an Address and a Note for the user if desired. This information will not be available to passengers or unauthorized users.
Add a new Messenger
If you have activated SMS notifications, the messages will be sent from the device where the messenger user is logged in. Make sure that this device is capable of sending SMS.
These messages can be sent directly from the Driver App. For example, a message can be sent to the passenger when a driver is assigned to their ride. For this to work, the driver in question needs to also have the messenger role and their driver app must be installed in a device capable of sending SMS.
To enable this role check the box “Allow as messenger” and save the changes on the top right corner of the panel.
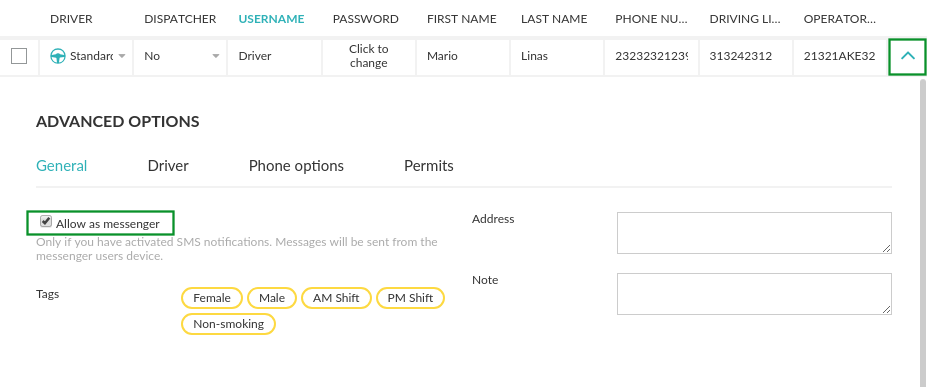
You can also add User Tags that can be used for additional information. Follow the link for more information about it.
The Envelope app
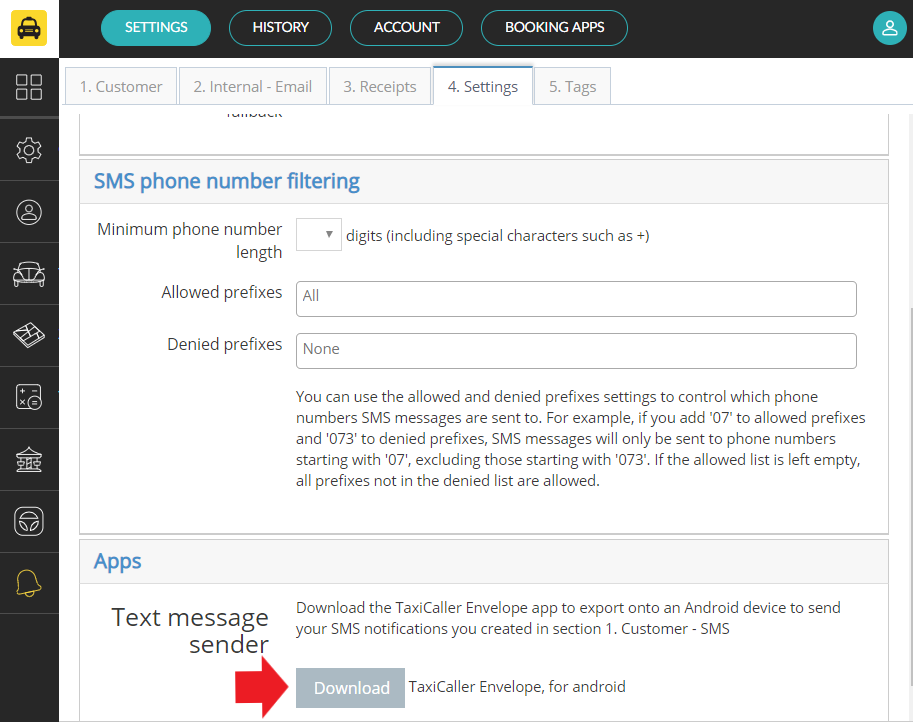
If no drivers are assigned as messengers, but you still want the SMS notification functionality to work, you’ll need to have at least one Android device capable of sending SMS with the Envelope app installed. You can download the Envelope app from the Admin panel > Settings > Notifications > Settings > Apps; download it and then export it to an Android device.
Driver

Approved devices
Use this option to limit which device(s) a driver can use. Simply add the Device ID to the “approved devices” field and the driver will only be able to start shifts from that specific device. You can find the unique Device ID at the bottom of the log-in screen in the Driver App.
Fare change rate
This option is to be with the Bank feature. You can read more about this here.
Driver picture
Add a picture that may show when a passenger books a ride.
Dispatcher options
![]()
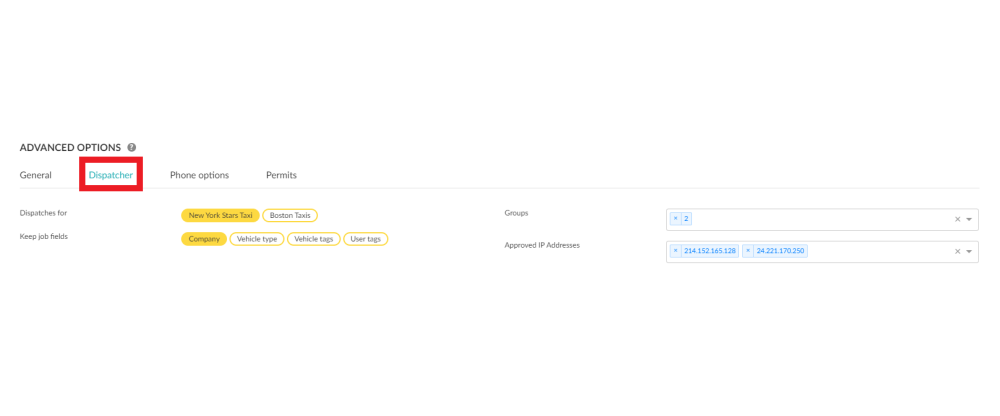
Dispatches for
This allows you to select which company profile(s) the dispatcher dispatches for, if left unmarked the dispatcher dispatches for all of the company profile’s on the account.
Keep job fields
This feature remembers the first selections of the shift. For example, if you have the ability to work for multiple company profiles but you mainly work for “New York Star Taxis” —if you select New York Star Taxis at the beginning of your shift this is the new default for the coming jobs until you change it manually.
Groups
The group feature is used to group vehicles and dispatch users. For example, if you have
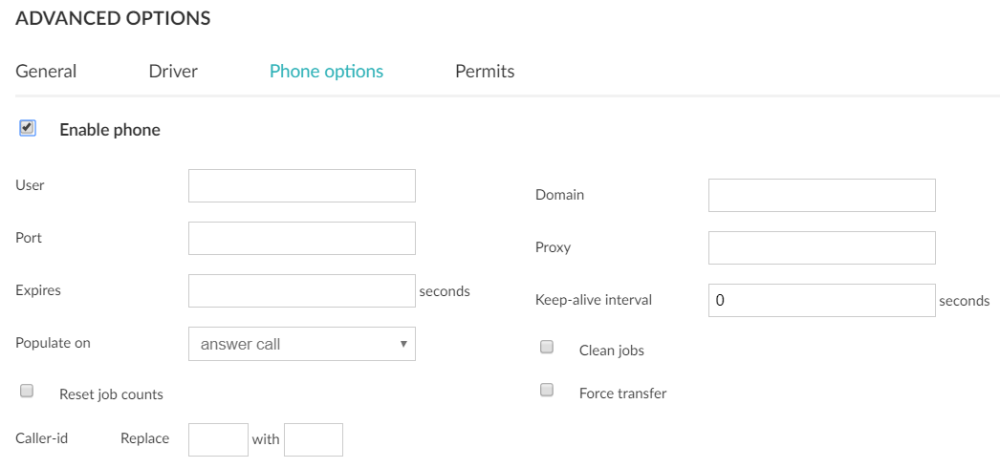
Phone options – Caller ID
For this feature to work, you will need first to enable the phone options in a dispatch user.

Then, you will need to get a VoIP service provider to be able to get the credentials needed to connect with Taxicaller softphone.
We have a standalone softphone client that technically should be compatible with any VoIP provider that supports the SIP standard, so if you have a VoIP provider in mind but are not sure whether they would be compatible with our softphone or not, you should check if that provider can connect their VoIP service to a third-party softphone using the SIP standard.
To download Taxicaller softphone please click on the following link Download Taxicaller Softphone, you will need to have installed the softphone before trying to integrate with your VoIP provider.
Once you have:
- Enabled the dispatch user
- Downloaded the Taxicaller softphone
- Gotten your credentials from your VoIP provider
You will need now to configure the Dispatch user both in the Admin Panel and Dispatch Consol.

The VoIP providers that Taxicaller recommends are:
Ring Central http://www.ringcentral.com/
VOIP Studio http://voipstudio.com
Sip Trunk (USA) https://www.sip.us/
Cellip (Sweden) https://www.cellip.com/
If you are interested in integrating with VoIPStudio please check the following article: “How can I integrate VoIPStudio?”: https://www.taxicaller.com/en/help/kb/KV1uIBudEUpTtmO7